Nothing is as useful in preventing decorating mistakes as a solid preproduction approval process.
I don’t mean to contradict myself- I still believe that the first step and most important step toward making your decoration conform to customer expectations is a good interview process and clear communication. That said, approvals are the last, best line of defense against any flaws in your initial interview or interoffice communication. Approvals provide a crucial opportunity for customer feedback and serve to protect you from assuming fault for customer errors.
The approval process not only allows a customer to review your work and give the go-ahead for production, it also allows you to restate expectations that you have for the order process, to describe your understanding of your responsibilities, and to make clear any information that the customer may have missed. We now have everything from cloud-based tools and online art management systems for securing approvals; helpful as they are, there’s no excuse for not having an approval process in place. You can create a robust system with nothing more than a couple of e-mails and a little discipline.

Admittedly, job information management systems really do help in the long run- but even without them, the approval process is key.
The Approval Stages
In our shop, we’ve always used a staged approval process. Our approvals use between 1 and 3 stages, depending on the artwork the track record we have with a customer. An average job, however, will go through a 2-stage approval before going to production. The descriptions below describe each stage, what information you should provide, why it is useful, and what you should look for in a response from your customer.
-
Pre-Digitizing Art Approval
If you have been directed to drastically alter the customer’s initially provided art, find must significantly change art to serve the technical needs of embroidery, or have to recreate art from a questionable source just to have a clean enough file from which to work, you’ll likely want to get an art approval before you put in any digitizing time, especially with time-consuming, detailed pieces. Any time you have to create a new piece of art before you digitize, It’s worth taking the time to have the art checked by the customer. After all, it’s much simpler to edit a piece of vector art than to replace or re-tool digitized files, even when you created the condensed file yourself. This e-mail should include an easily viewed version of the art; I tend to include a PDF for quality’s sake and a raster, like a JPG or PNG for quick viewing on mobile. At this stage, we are looking to make sure the customer verifies layout, spelling of text, and general placement of colors- this stage is only useful for pointing out gross errors in the art, not for embroidery execution. Be sure to state that digitizing will not start until the customer affirms that the art is correct.
When making large alterations and/or adding items that interact with the original provided art, it’s best to work things out before digitizing. After all, in digitizing a design, you will knock out overlapped areas of stitching and change your sequencing depending on how elements are layered and how they interact when stitched- if you have to change the position of an overlying art element after digitizing, you may have a horror of retroactively resequencing and digitizing missing pieces of underlying elements.

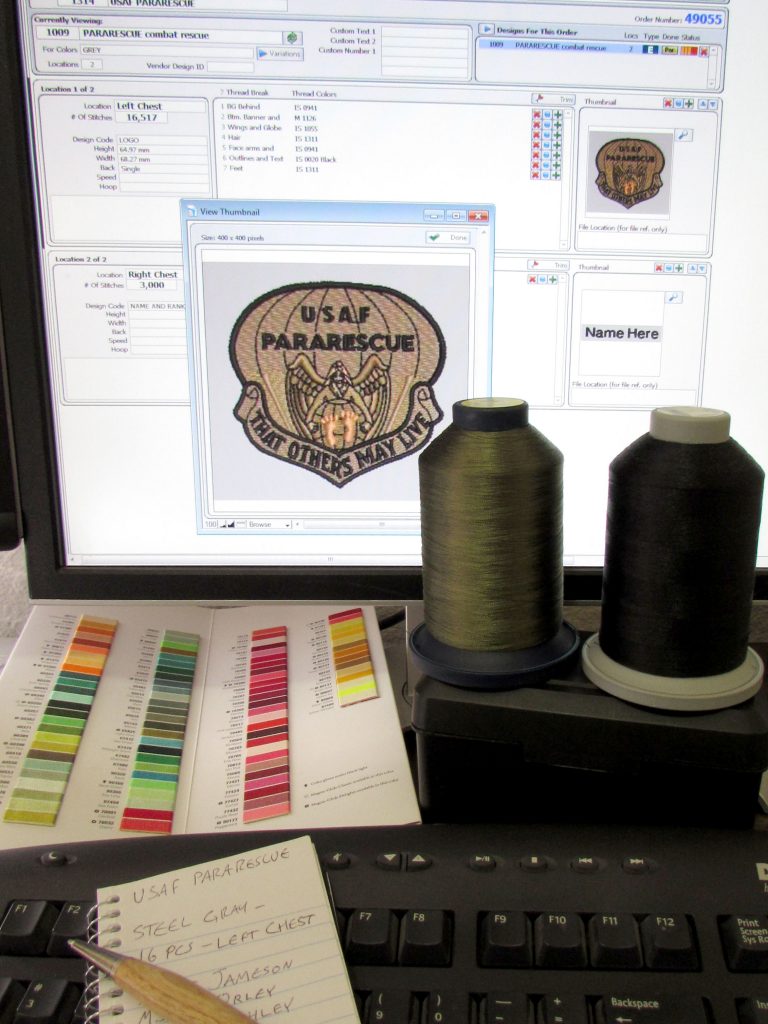
Digital previews are flawed at best, but they can save you from making gross errors in layout and spelling.
-
Digital Preview of your Digitized File
This step is universal; no matter your workflow, you should have your customer approve your digitized file before you expend time stitching. This message should contain a preview of the design, the finished dimensions of the design, and a description of the design placement, as well as a confirmation of any special instructions the customer may have provided. Digitizing software universally provides a mock 3D preview, and most will output a raster graphic for easy mailing, but I prefer printing the 3D preview in a PDF production approval document to add to the raster graphic. My document includes my company logo, measurements of the design, the design reference name and a date that I created the document; meaning that even if the PDF is passed along out of context of my message, the critical information about the design is kept intact and easily viewed by the customer. When a specialty placement is involved, I may elect to create a mock-up showing the placement of the design on the garments in question as well, particularly if this client has elected to go directly to production after approving the digital preview.
Though making a change at this stage can be troublesome, catching a problem here still saves valuable production time on the machines. It’s critical to tell your customer, however, that colors are never represented with 100% accuracy on these 3D preview. Our approval messages always state that we will match the colors provided in the original art or that we’ll use specific thread colors if the customer has selected them beforehand. You can’t predict how a customer’s monitors or mobiles may alter colors, even if you attempt to make the preview look correct on your own screens. Make certain that this is transparent to the customer and let them know that the only foolproof method for judging thread colors is in-person. Most customers, particularly those familiar with using color-matching systems, will probably trust you to make the call, but you want to be certain that they are aware of potential complications. Make sure the customer understands that they need to verify the spelling of any text or names and that no sampling or stitching will occur until they approve the digital preview.

Even rough snapshots like these are more informative than a digital preview. Color is still suspect, but at least you can judge stitch quality and relative color to the garment.
-
Sampling / Stitch-out
Some clients, particularly those for whom you’ve already created quality embroidery work, may not require a viewing of the actual sample or stitch-out before going to production. In most cases, however, you’ll still want a customer to view a true embroidered sample before you stitch their final order. If possible, you’ll want the customer to see the sample in-person, particularly if the customer is very concerned about colors or has selected a particularly problematic garment. When an on-site verification of the design isn’t possible, e-mailing a clear, crisp photograph is often enough to provide a final check. Once again, be sure that the customer is aware that pictures will not represent the color with complete accuracy in this case.
This is also a final chance to verify size and placement; simply laying your sample design on a garment in the proper location and snapping a pic provides a good measure of both scale and placement- it’s a low tech mock-up method, but it is effective. As always, make sure that you are sampling on the appropriate color and material with the proper stabilizer and setup that you’ll be using in the final embroidery; it’s good practice to accurately reveal problems before you go to production, and it makes for a completely honest representation of the quality your customer will see when they open their order.
Maintain the Habit
When the production queue is full and we find ourselves short-handed, it’s easy to think let processes like these go in the name of speed. That said, there’s little that can slow you down more than repeating an order or the time spent calming an unhappy client. The first time you avoid a major error at the last moment, you’ll know just how valuable the process can be. It’s easy to give in to temptation, particularly with repeat customers and easy designs to break with this process, but I implore you to make the approval process a long-term habit. It increases the comfort level of your customer, makes your process transparent, and makes you look careful and professional in your work. In the end, you’ll save more than garments, time, and supplies; when the quality of your work is suspect or flatly incorrectly done, what hangs in the balance is your reputation. Think of it this way; if pride in your work and quality aren’t enough to make you take the time, think about the effort you’d be willing to spend for the lasting respect and loyalty of your customers. A couple of contacts isn’t too much to ask.


LEAVE A COMMENT